Summary:
First. Precautions for installation of casement windows1. When installing a casement window, first determine the positi...
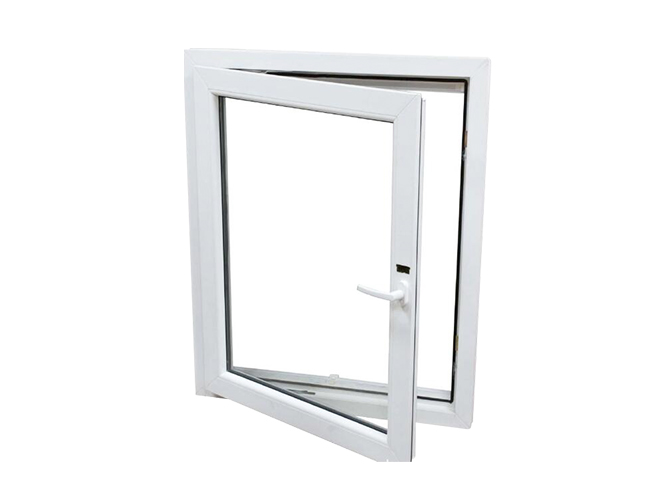
First. Precautions for installation of
casement windows1. When installing a casement window, first determine the position. The position of the window frame must be determined through regular calculations. Usually the coordinate reference line and the bottom 500mm horizontal line are used to determine the position of the window frame, and then the azimuth line of the ink line is used to pop up.
2. Temporarily fix the window frame when opening the casement window, and temporarily fix it with a mold after it is placed in the correct position. The azimuth should be adjusted and calibrated by the level ruler and the wire drop, and then fixed on the embedded brick with a nail after it is correct. Find a stable place when the window frame is stuck, otherwise it will bring safety hazards to the follow-up. The nail caps must be completely nailed into the window frame.
3. It is the hinge that connects the window frame and the window sash, and the hinge installation is also very important. First, mark the position where the window sash and the window frame are connected to the hinge, and the measurement must be accurate. Then remove the hinge slot at the marked position, and finally install the upper hinge. The position of the hinge slot should be accurate, just enough to be installed, too small affects the installation and use, and too large affects the appearance.
Second. Installation and operation process of casement windows
1. Find the edge of the door and window at the top level, use a thread drop to pull the edge of the door and window down, and use theodolite to operate the upper level. Mark a line at each door and window, and deal with the non-straight edges in time. The horizontal position of the door and window is based on the floor +50cm horizontal line. Measure and straighten the elastic line of the skin under the window.
2. Determine the installation position of doors and windows in the thickness direction of the wall according to the large-scale drawing of the external wall and the width of the window sill. When the thickness of the external wall is deviated, the exposed size of the window sill in the same room shall prevail.
3. Anti-corrosion and embedded connecting parts, if the aluminum alloy doors and windows are installed with fixed iron sheets, galvanized iron parts should be used.
4. Put the doors and windows according to the position line, hang them upright, and fix them temporarily with wooden wedges when there is no problem.
5. Installation and fixing of door and window frames
(1) Use electric hammers to drill holes on the left and right sides and upper side of the window frame, and fix them with expansion nails.
(2) Fix the lower part of the window frame with a fixed iron sheet. The distance between the iron sheet and the window corner should be less than 180mm, and the distance between the iron sheets should not be greater than 600mm. After the door and window frames are installed, it is strictly forbidden to use them as elevated fulcrums for any type of work. It is strictly prohibited to smash or touch them during indoor transportation to prevent damage.
(3) Determine the position. The outer side of the frame is 5mm away from the return line as the reference for positioning and installation, with a deviation of ±2mm.
(4) After the window frame is installed, the verticality deviation is ±2mm, the diagonal deviation is ±2mm, and the sideline deviation is ±1mm.
(5) The position of the splicing screw of the combined window should not exceed 180mm from the end point, and the distance between the holes should not exceed 500mm.
(6) Foam filling around the frame, uniform and plump, no missing, leaving defects, use fixed iron nails to fix the slide.
(7) The expansion nails are fastened in place, and there must be no looseness. Leakage is forbidden, and 120mm expansion pipe nails are used to fix the insulation wall.
(8) The position of the fixed glass device is centered, and the glass block is filled according to the rules for positioning. The tempered glass installation is on the facade, and the tempered sign is under the glass;
(9) The outer facade of the window frame is sealed with silicone rubber, and the inside is sealed with a sealant. The width of the glue is not more than 10mm. The fixed glass facade is sealed with black silicone rubber. The inside of the window is sealed with a rubber strip, the rubber strip is 45 degrees. Diagonally, there should be no gaps in the joints, glue injection and bonding The surface is straight without stretching.
6. When installing sliding door and window sashes, first insert the outer sash into the outer groove of the upper chute and naturally fall into the corresponding chute. Install the inner sash in the same way. Installation of side-hung doors and window sashes, flexible opening and tightly closed, starting at 15% of the height of the sash. Then insert the door and window sash into the frame and temporarily fix it. After adjustment, fix the door and window sash on the hinge. Ensure that the upper and lower hinges are on the same axis.
(7) The overlap amount of the control standard frame and fan should meet the design requirements of 10mm±1mm.
(8) Install hardware accessories after the construction is completed. It requires firm installation and flexible use.
(9) For the windows on the outside of the glass, after installing the crimping line, not only the crimping line and the glass joint are glued and sealed, but also the crimping line and the frame profile joints must be glued and sealed.


.jpg)